Temporary fencing keeps unauthorized foot traffic off an active job site and keeps a project on the right side of its safety plan. Here is how Bay Area contractors, property managers, and event producers set up temporary fencing on a job site correctly, from the perimeter walk to the final walkthrough.
- Setting up temporary fencing on a job site starts with a perimeter walk and gate count, not a delivery date.
- Standard 6 ft by 10 ft chain link panels on rubber feet handle most San Jose construction sites without core drilling.
- Demolition sites need panels braced every 8 feet instead of 10 because debris piles and equipment traffic add wind load.
- Skip stake-mounted fencing on paved lots. Rubber base panels install faster and pass inspection without anchoring into concrete.
- Valley Services delivers and sets temporary fencing across San Jose, Santa Clara, Sunnyvale, Mountain View, and Milpitas.
Why This Matters
A fenced perimeter is not decoration. On an active job site, it controls who walks in, keeps materials off the sidewalk, and backs up the site safety plan that most general contractors carry into a 2026 permit review.
Cal/OSHA does not set one fence height for every job, but insurance carriers and city inspectors expect a controlled perimeter on excavation, demolition, and multi-unit construction sites. Property managers apply the same logic to vacant lots and buildings sitting between tenants. Get the fencing wrong and the rest of the schedule slips behind it, because nobody pours concrete or runs equipment past an open perimeter.
What You'll Need
- An accurate perimeter measurement in linear feet, not square footage
- A panel count based on standard 10 ft sections
- A gate count and width sized for the largest piece of equipment crossing the line
- A base type decision: rubber feet, concrete blocks, or driven stakes, depending on the surface
- Privacy screening if your permit or a neighbor complaint history calls for visual screening
- A delivery date tied to your grading or demolition schedule, not your framing schedule
Valley Services sets up temporary fencing for construction sites across the South Bay, and the crew sizes panel count and gate placement to your site plan before delivery, not after.
The Steps
1. Walk the perimeter and measure linear footage
Measure the full boundary you need enclosed, not the lot's square footage. A quarter-acre lot can run anywhere from 400 to 700 linear feet of fence line depending on shape. Walk it with a wheel or laser, not a guess off the site plan, because setbacks and slopes change the real number.
Common mistake: ordering panel count off the parcel size on the county assessor site. That number almost never matches the fence line you actually need to cover.
2. Confirm permit and site control requirements
Check what your building permit or event permit specifies for perimeter control before you order anything. Some San Jose demolition permits specify fencing height and gate locking requirements directly in the conditions of approval.
Call the jurisdiction or check the permit conditions in 2026 before ordering, not after the fence is already on site. A fence that doesn't match the permit gets flagged at inspection and you re-order on a compressed timeline.
3. Calculate panel count and gate placement
Divide your linear footage by 10 to get a rough panel count, then add gates. A single swing gate covers 12 ft; a double slide gate covers up to 24 ft and handles excavators, roll-off container trucks, and concrete pumps.
Place at least one gate on the side facing your staging area and a second on the opposite side for emergency egress. Expected outcome: equipment moves in and out without crews unlocking and re-locking the same gate all day.
4. Prep the ground before delivery
Clear the fence line of debris, grade obvious dips, and mark any underground utilities before panels arrive. On a paved lot, rubber base panels sit flush without drilling. On dirt or gravel, stakes go in easier if the ground isn't compacted.
Common mistake: scheduling fence delivery before grading is done. Crews end up hand-carrying panels around a site that isn't ready, which adds hours to a job that should take one.
5. Set and stabilize panels
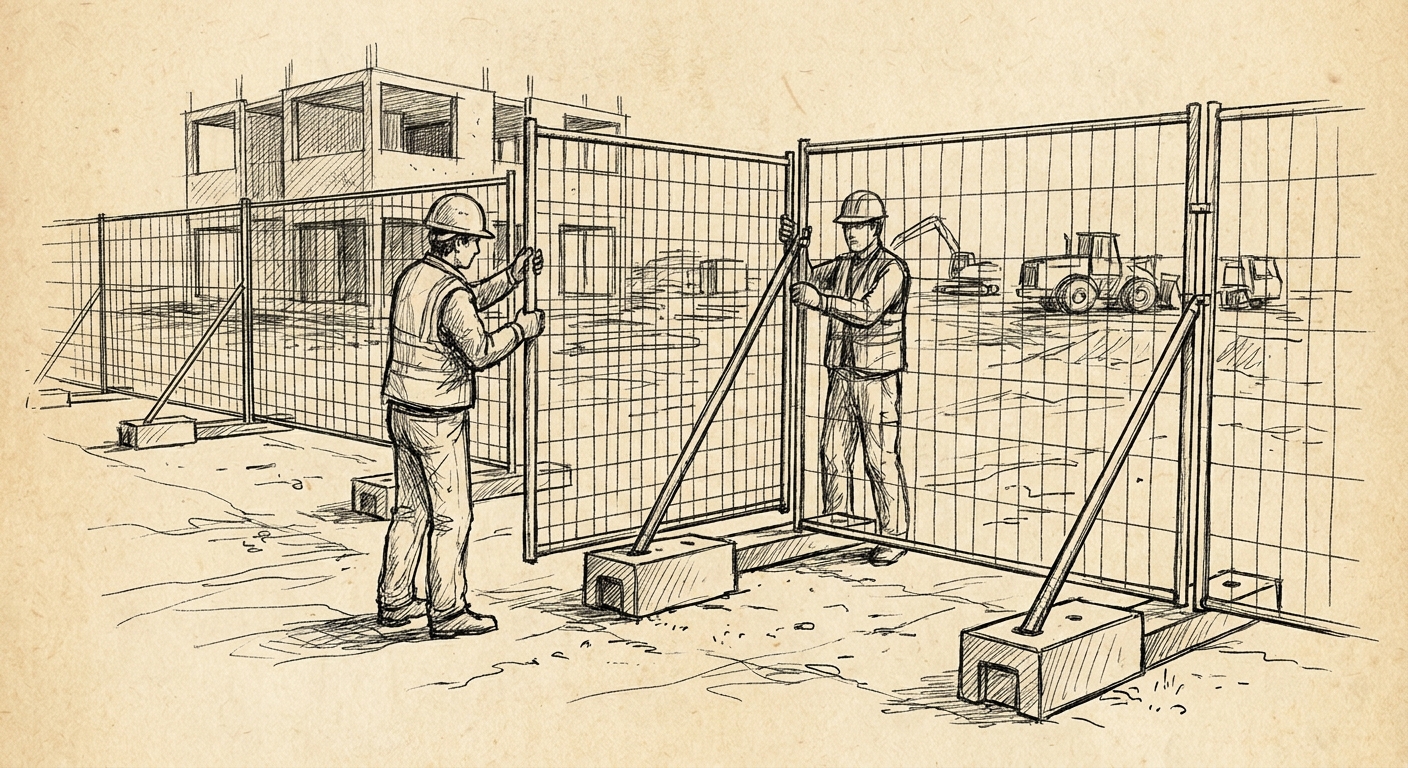
Stand panels starting from a corner or gate post and work the line in one direction. Rubber-footed panels need the feet fully seated and, on windy sites, sandbagged or weighted at every third panel. Demolition sites with heavy debris and equipment traffic need bracing every 8 feet instead of the standard 10.
Expected outcome: a fence line that doesn't shift when a loader passes within a few feet of it.
6. Secure gates and locking hardware
Install gate hardware last so panels aren't racked out of alignment by gate weight during setup. Padlock every gate at the end of each shift, even ones facing an interior yard. Job site theft usually walks through the gate crews forgot to lock, not the fence line itself.
7. Add screening or signage if the permit requires it
Some municipal and event permits require visual screening or posted signage on the fence line. Mesh screening cuts sightlines and wind load at the same time; standard mesh panels handle most wind conditions without tearing loose.
8. Walk the fence line before final inspection
Check every panel connection, gate lock, and base for movement 24 hours before your city or fire inspection. A single loose panel or unlocked gate on a demolition site can hold up an inspection that everything else on the job is ready for.
Troubleshooting
- Panels blow down in wind: Add sandbags or water-filled bases at every third panel, not just the corners. Open lots near the Bay catch more wind than fenced sites tucked between buildings.
- Panels shift on paved ground: Switch from stakes to rubber-footed or concrete-block bases. Stakes don't hold on asphalt or concrete no matter how deep you try to drive them.
- Gates won't align after a few weeks of equipment traffic: Check the gate post for lean, not the hinge. Heavy trucks passing close to a gate post shift the base underneath it over time.
- People still get through despite the fence: Add a second lock on gates facing public streets and check for gaps where the fence meets a building or existing wall. Most unauthorized entries happen at a seam, not through a panel.
- Fence fails a city inspection: Compare your setup against the permit conditions line by line before the inspector arrives. Height, gate width, and screening requirements are the three items inspectors flag most.
- Screening tears in a storm: Standard mesh handles typical wind; sites in exposed or hillside locations need heavier screening or shorter screened runs between open sections.
Tools and Resources
- Best temporary fence rental for construction sites covers panel and gate specs by project type
- K-rail for sites needing vehicle barriers in addition to pedestrian fencing
- A wheel or laser measure for accurate linear footage before ordering
- Sandbags or water-filled bases for open, wind-exposed lots
- Your permit's conditions of approval, checked against the fence setup before inspection
On active construction sites, fencing usually goes up before the roll-off container and restrooms land, since the perimeter defines where equipment stages and where crews can safely access the site.
What to Do Next
Demolition sites, vacant property security, and outdoor events each call for a different panel spacing, gate count, and screening plan. A demolition perimeter braced for debris and heavy equipment looks nothing like a fence line set up to secure a vacant lot for six months. Match your fencing spec to the job, not the other way around.
“If the wind can walk your fence panels off a job site, they were never anchored to it.”
Talk through your fencing setup
Panel count, gate placement, and delivery timed to your schedule.
FAQ
How much temporary fencing do I need for a job site?
Measure the full perimeter in linear feet, then divide by 10 for a standard panel count. A quarter-acre site typically needs 400 to 700 linear feet depending on lot shape and setbacks.
What height should temporary fencing be on a construction site?
Six feet is standard for most active construction and demolition sites in 2026. Check your specific permit conditions, since some jurisdictions specify height directly in the approval.
Do I need a permit for temporary fencing?
The fencing itself usually falls under your existing building or demolition permit rather than requiring a separate one. Check your permit's conditions of approval for height, gate, and screening requirements before ordering.
How do I keep temporary fence panels from blowing over?
Add sandbags or water-filled bases at every third panel, especially on open lots. Stakes don't hold on paved surfaces, so rubber-footed or concrete-block bases work better on asphalt or concrete.
How wide should a gate be for equipment access?
A single swing gate covers about 12 feet; a double slide gate opens to 24 feet for excavators, roll-off container trucks, and concrete pumps. Size the gate to your largest piece of equipment, not your smallest.
Is temporary fencing different for demolition sites versus new construction?
Yes. Demolition sites need bracing every 8 feet instead of the standard 10 because debris piles and heavy equipment traffic add wind load and impact risk that new construction sites don't have yet.
Can temporary fencing include privacy screening?
Yes, mesh screening attaches to standard panels and cuts sightlines while also reducing wind load on exposed sites. Some permits require it for sites near residential areas.
Who sets up temporary fencing in the San Jose area?
Valley Services delivers and installs temporary fencing across San Jose, Santa Clara, Sunnyvale, Mountain View, and Milpitas, sizing panel count and gate placement to the site plan before delivery.
One Last Thing
Most fence failures on job sites trace back to one unlocked gate, not a weak panel. Walk every gate at the end of every shift, even the one facing the interior yard nobody thinks anyone would use.
Valley Services has operated out of the same San Jose yard since 1986, third generation, same family. One call covers temporary fencing, K-rail, roll-off containers, and restrooms for the same job site, which keeps site logistics on one schedule instead of three. Call (408) 297-5404 or visit valleyservices.biz to talk through panel count and gate placement before your next delivery date.